Components
The Internet of Things Home project comprises the following:
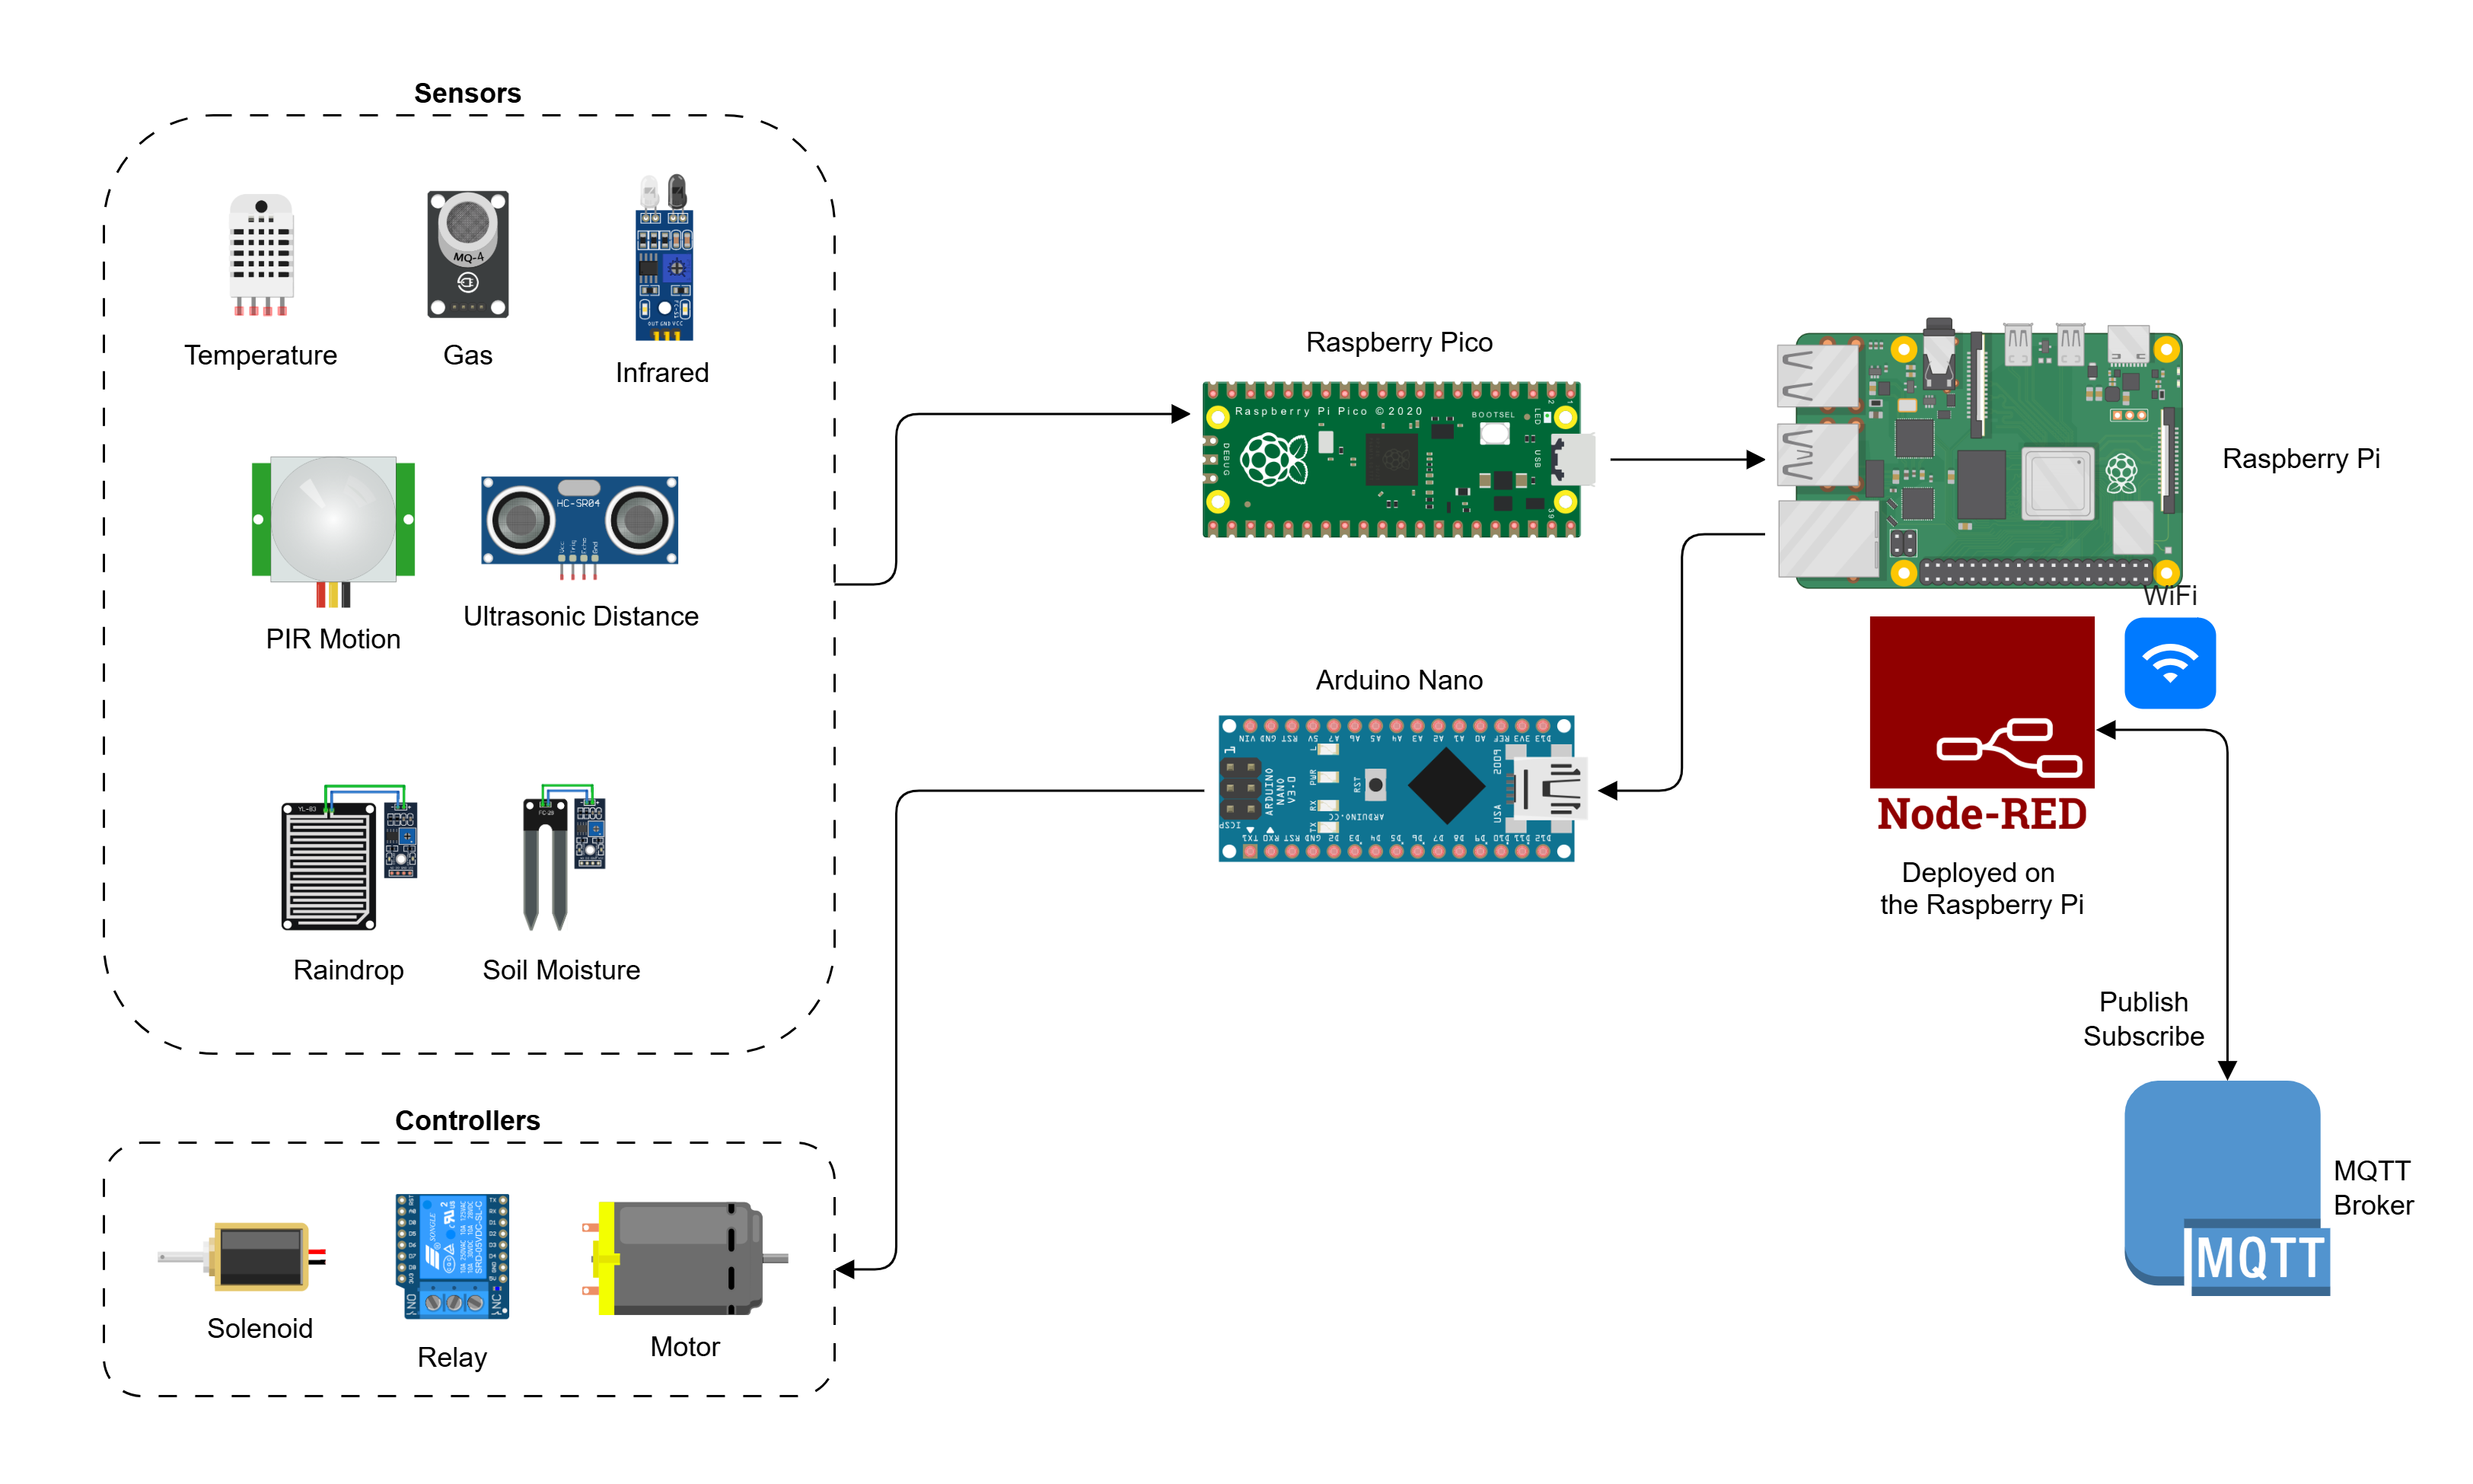
1. Microcontroller Circuits
The solution will have four circuits, each using one of the three most popular boards - Arduino Nano, Raspberry Pico, and ESP32 - with various modules and components distributed across them. The Arduino Nano and ESP32 will be programmed using the Arduino IDE and the Arduino C language while the Raspberry Pico will be programmed using the Thonny IDE and the microPython language.
2. Node-RED Platform
Node-RED is a low-code IoT Platform that can be used to exchange data between the circuits and the mobile app via the MQTT Broker without requiring the boards to have WiFi capabilities. Node-RED can be run on any computer to which the circuits need to be connected using a standard USB cable. We will use the Raspberry Pi to run Node-RED but you can use a laptop or desktop computer if you do not want to procure and setup a Raspberry Pi.
3. MQTT Broker
An MQTT Broker on the cloud is the easiest way to exchange data between physical microcrontroller circuits and the IoT app. You can set up a local broker on your computer or you can use one of many free brokers available on the cloud as a Platform-as-a-Service (PaaS) offering.
4. Mobile IoT App
While we will not cover how to develop the mobile app, you will learn how IoT Mobile Apps can be configured and how they function to display data from the sensors to the user and accept control signals from the user to send them to devices/appliances.
Architecture
Solution Components
You do not need to add all the sensors and controllers for the Nano and Pico circuits. You can even just add one of each to achieve the learning objectives of this project.
You will learn to assemble and program the following two circuits:
You will learn to configure an MQTT Broker on the cloud.
You will learn to install Node-RED and program and configure Node-RED flows.
While you can install and run Node-RED on your computer, you can optionally use the Raspberry Pi, which is much more compact and useful for IoT solutions.
Circuit Diagram
The circuit diagram for the complete solution with all circuits connected is shown below:
